Potatoes are one of my favorite crops to grow in the garden. They grow easily, give bountiful harvests, come in fascinating varieties, and are much more delicious than store-bought potatoes. Let me share with you some secrets to growing potatoes, so you can enjoy homegrown potatoes as much as I do.
This classic garden crop is not a complicated plant to grow and is suitable for beginner gardeners. However, for healthy plants and maximum harvests, you’ll want to follow my tips below. These secrets to growing potatoes will set you up for success and help you prevent any problems.
Secrets to growing potatoes – the list
Whether you’ve had problems growing potatoes in the past, or are looking to try something new, this article will guide you through all the important points. Think of it as a checklist and make sure your conditions are right before planting.
Chit seed before planting
To get a headstart on the establishment of your potato plants you should chit your seed before planting. If you don’t know what chitting is, it just means to encourage growth on a seed potato before planting.
Potatoes are grown from potatoes harvested the previous year. These seed potatoes produce new growth from the eyes which will develop into a potato plant. You’ve probably noticed this on potatoes you’ve kept for too long.
If your seed potato is planted and exposed to too much moisture before developing roots, it will rot. Chitting your seed potato before planting will ensure it has enough growth and won’t rot in the ground.
Start chitting your seed potatoes about six weeks before planting. Do so by placing them in containers or egg cartons in a warm spot with lots of sunlight. Exposing them to warm conditions indoors before planting out will encourage them to grow shoots early. When the shoots are a couple of centimeters you can safely plant them outside.
Prevent soil compaction
Potatoes are grown for their tubers which grow underground. So it shouldn’t be a surprise that the tubers need appropriate conditions to reach their full size. Ensuring there is no soil compaction is key for optimal potato growth.
When the soil is compacted it means that the soil particles are densely scrunched together. This compaction makes it impossible for potato tubers to get big because they don’t have enough space to grow. If your soil is compacted, your potatoes will stay quite small.
Compacted soil also makes it difficult for water to penetrate into the ground. The water spreads horizontally along the surface, making it inaccessible to the plants. Even if you water often, the plant roots won’t grow deep and will be very sensitive to drought.
Ensure good drainage
Since potatoes have thick tubers underground, which are 80% water, to begin with, they are particularly susceptible to rot. If the soil is over-saturated with water and doesn’t have good drainage, your potatoes will easily rot in the ground.
To achieve good drainage in your soil, amend it with lots of compost and a bit of coarse sand. The compost will help increase drainage, support soil health, and prevent compaction caused by muddy soil drying up. The sand will also help give space between the soil particles, giving more room for potatoes to grow.
Loamy soil type and correct pH
Prepare your potato bed with loamy soil and make sure the pH is between 5.0 and 6.0. Growing potatoes in this type of soil will prevent a lot of problems in the future.
Loamy soil is loose and fluffy, which means it’s not compacted and drains easily. As I’ve mentioned above, potatoes will have a hard time growing to their full potential in hard soils.
A slightly acidic soil pH prevents diseases like potato scab. Check out our article on the optimum soil pH for growing potatoes, to learn more.
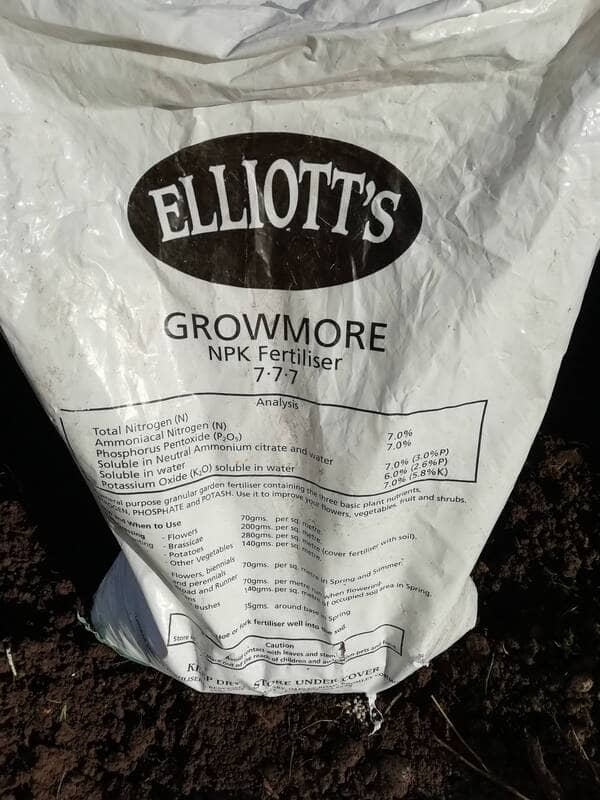
Apply enough fertilizer
Potatoes are nutritionally demanding plants and need to be well-fertilized. Since they are root crops, they’ll appreciate higher doses of potassium and phosphorus. So choose a fertilizer with a 5-10-10 ratio.
Alternatively, you can make your own seaweed fertilizer if you have access to the coast. We wrote an article about making seaweed fertilizer for your potatoes that gives you several applications.
How often you fertilize your potatoes will depend a lot on your soil and what type of fertilizer you’re using. I am constantly incorporating compost into my soil, so it doesn’t need a lot of extra nutrients. However, about halfway through the growing season, I like to drench the soil with liquid seaweed fertilizer.
Keeping your potato plants well fertilized will lead to strong growth, lots of big potatoes, and healthy plants. If you choose not to fertilize, your potatoes will still grow, the harvest just won’t be as big.
Water
Potatoes need enough watering to stay hydrated throughout the hot summer months, but not so much that they rot. Deep watering allows the water to trickle down into the lower soil levels. This brings water away from the area around the potatoes, preventing rot and encouraging deep roots.
I usually water my potato plants well twice a week in warm weather. Deep watering less frequently is easier for a gardener to manage and promotes healthy growth. It also allows the topsoil to dry between waterings.
Plenty of light
Potatoes need sunlight/daylight to grow well. Your potato plants should be able to have 6 to 8 hours of daylight a day. The main point to be aware of here is that you shouldn’t plant your potatoes in a place that will shade them from daylight – like under trees or large hedges. Most parts of the world will provide enough daylight to grow potatoes unless you live near the extreme poles. If you don’t have a space that gets so much sun, don’t worry.
Potatoes will still grow in shaded areas, but won’t do so well. Less light means you may end up with smaller plants and smaller potatoes. Sometimes when harvesting potatoes that don’t grow well and are smaller you’ll notice the soil in the drill is damp, this increases the chances of rot since the potatoes can become saturated in water. If you’re growing potatoes in a shady area, make sure there is good airflow and be extra careful not to over-water.
Remove weeds
Reduce the competition for your potato plants by keeping their bed weeded, especially when the plants are small. Potatoes need space to grow and weeds will compete for space and nutrition.
Keep weed pressure down by manually pulling them, mulching heavily, or both. Concentrate your efforts around the base of the plants and keep an eye out for weeds with taproots. When the potato plants get bigger they will form a large canopy and keeps the weeds out easily. Until then, get down and pull those weeds!
Keep plants disease and pest free
The best way to keep your potato plants disease and pest-free is prevention. The best defense against pests and diseases is to have a healthy plant. So make sure you’re following the advice above. Keeping your soil pH slightly acidic and maintaining good drainage is particularly important.
To keep my potato plants free of pests and diseases, I also like to apply a neem and aloe vera foliar spray once a month. I also encourage beneficial insects in my garden by keeping bug hotels and actively releasing ladybugs.
Monitoring your garden and maintaining best practices will also help keep your plants problem-free. If you spot something, deal with it early on before it spreads to the rest of your potatoes.
To prevent blight either plant a blight-resistant variety or spray a copper sulfate or other homemade blight spray.
Let the potato plant mature fully before harvesting
Potato plants will tell you when they are ready, so let the potato plant mature fully before harvesting. When the plant begins to die, the leaves will turn yellow and eventually dry brown.
Wilted, yellow, and brown leaves at the end of your growing season are an indication that it’s time to harvest. You’ve allowed the potatoes maximum time to reach their full size and they won’t grow more on a dying plant.
To enjoy small, fingerling potatoes you can harvest them early when the tubers are still small. If you like small potatoes, anticipate getting less return per plant and space your plants closer when planting.
Harvest in dry weather
Harvesting your potatoes in dry weather will make the job easier and will help preserve the soil structure. It’s a win-win for both the gardener and the garden.
Working the soil when it is wet encourages compaction, especially if you’re using a fork to loosen the potatoes in the soil. Working the soil when it’s wet would cause it to clump and dry in a compacted state. For this reason, it’s important to harvest when the soil is dry.
If you’re not concerned with compaction, think about the logistics of digging up potatoes in wet soil for a second. You’d have to sort through the mud and your potatoes would be caked in dirt. Harvesting when the soil is dry makes it much easier to sift through and pull out clean potatoes.
Make the job easier on yourself and preserve your soil for future plantings by simply waiting to harvest in dry weather. A few dry days make a big difference when harvesting.
Conclusion
I love growing potatoes, it’s rewarding to see the improvements you make each year as you perfect your skill. Homegrown potatoes taste much better than store-bought ones also. The big secret to growing potatoes is detail – do every step the best you can and you’ll be well rewarded. If you follow all the points I’ve listed above you’ll be able to harvest tons of delicious potatoes.
Check each point in this article and make sure your potato growing conditions match up. You’ll be excitedly digging up potatoes from your garden in no time.